
Primary links

  • Home
  • AI
  • Kubernetes
  • Incus
  • Ansible
  • Terraform
  • OpenStack
  • Virtualization
  • Linux
  • SmartHome
  • HowTo

Misc

  • Linux
  • Hardware
  • Programming
  • Databases
  • Multimedia
  • Windows

Cloud

  • OpenStack
  • cloud-config
  • nextcloud

Virtualization

  • Virtualization
  • Incus
  • Docker
  • KVM
  • Kubernetes
  • LXC
  • LXD
  • QEMU
  • VMware
  • VirtualBox
  • multipass
  • podman
  • vagrant
  • XEN

Network

  • DNS
  • Firewall
  • Linux
  • OpenvSwitch
  • SSL
  • VLAN
  • VPN
  • iPXE
  • namespaces
  • nmcli
  • tcpdump

Storage

  • CEPH
  • DRBD
  • LVM
  • S3
  • ZFS
  • btrfs

Automation / CI/CD

  • Install
  • Ansible
  • GitLab
  • LLM
  • Preseed
  • Puppet
  • Terraform
  • Ubuntu autoinstall

Monitoring / Visualisation

  • Grafana
  • Icinga
  • Prometheus
  • Monitoring
  • ELK
  • mermaid

LSI sas2lash

LSI sas2flash

sas2flash.efi -o –sasadd 50030390040e7a10
sas2flash -o –sasadd 50030390040e7a10
sas2flash -o -listsasadd
sas2flash -o -e 7 -c 0
sas2flash -f 9207-8e.bin -c 0
sas2flash -b mptsas2.rom -c 0

Create UEFI disc
http://www.panticz.de/Create-UEFI-disc

Links
http://www.supermicro.com/support/faqs/faq.cfm?faq=19429
http://blog.widodh.nl/2014/10/flash-lsi-2308-to-it-mode-on-a-supermicro-x10sl7-f-mainboard/
http://www.lsi.com/sep/Documents/oracle/files/SAS2_Flash_Utility_Software_Ref_Guide.pdf
http://www.avagotech.com/products/server-storage/host-bus-adapters/sas-9207-8e#downloads
Lenovo ThinkPad

Update BIOS
https://pcsupport.lenovo.com/vc/en/

sudo apt install -y genisoimage
geteltorito jbuj73wd.iso -o x230.img
dd if=x230.img of=/dev/sdX

ThinkVantage button
http://www.thinkwiki.org/wiki/ThinkPad_Button
http://www.thinkwiki.org/wiki/How_to_get_special_keys_to_work
http://www.thinkwiki.org/wiki/Installing_Ubuntu_11.04_%28Natty_Narwhal%29_on_a_ThinkPad_X220

xev | grep -A2 --line-buffered '^KeyRelease' | sed -n '/keycode /s/^.*keycode \([0-9]*\).* (.*, \(.*\)).*$/\1 \2/p'
156 XF86Launch1
# start calc
gsettings set  org.gnome.settings-daemon.plugins.media-keys calculator 'Launch1'

Install thinkfan
[embed_url: https://raw.githubusercontent.com/panticz/installit/master/hardware/install.thinkfan.sh]

OPTIONAL: install lm-sensors to monitor temperatures

apt-get install -y lm-sensors

# manually set fan speed
echo level 0 | sudo tee -a /proc/acpi/ibm/fan

# read current fan settings
cat /proc/acpi/ibm/fan

# GNOME Sensors Applet 
sudo apt-get install sensors-applet

Docking station
https://thinkwiki.de/ThinkPad_Mini_Dock_Series_3
Unter Linux ist, mit der Intel Version (getestet mit einem L530 / T530), es möglich 2 x extern + 1 x intern zu nutzen wenn die externen Monitore die gleichen Auflösungen haben

optimus
https://www.dell.com/support/kbdoc/de-ch/000132622/handbuch-zu-nvidia-optimus-auf-dell-pcs-mit-dem-betriebssystem-ubuntu

sudo apt install nvidia-prime
sudo prime-select query
sudo prime-select intel

create a 2242 M.2 NVMe for ThinkPad T470
https://www.reddit.com/r/thinkpad/comments/16ngnfl/guide_cutting_m2_ssd/?tl=de

ZyXEL NSA320/NSA325

enable telnet
login as admin
http://192.168.2.127/r38571,/adv,/cgi-bin/remote_help-cgi?type=backdoor

telnet 192.168.2.127
root
YOUR_PASS

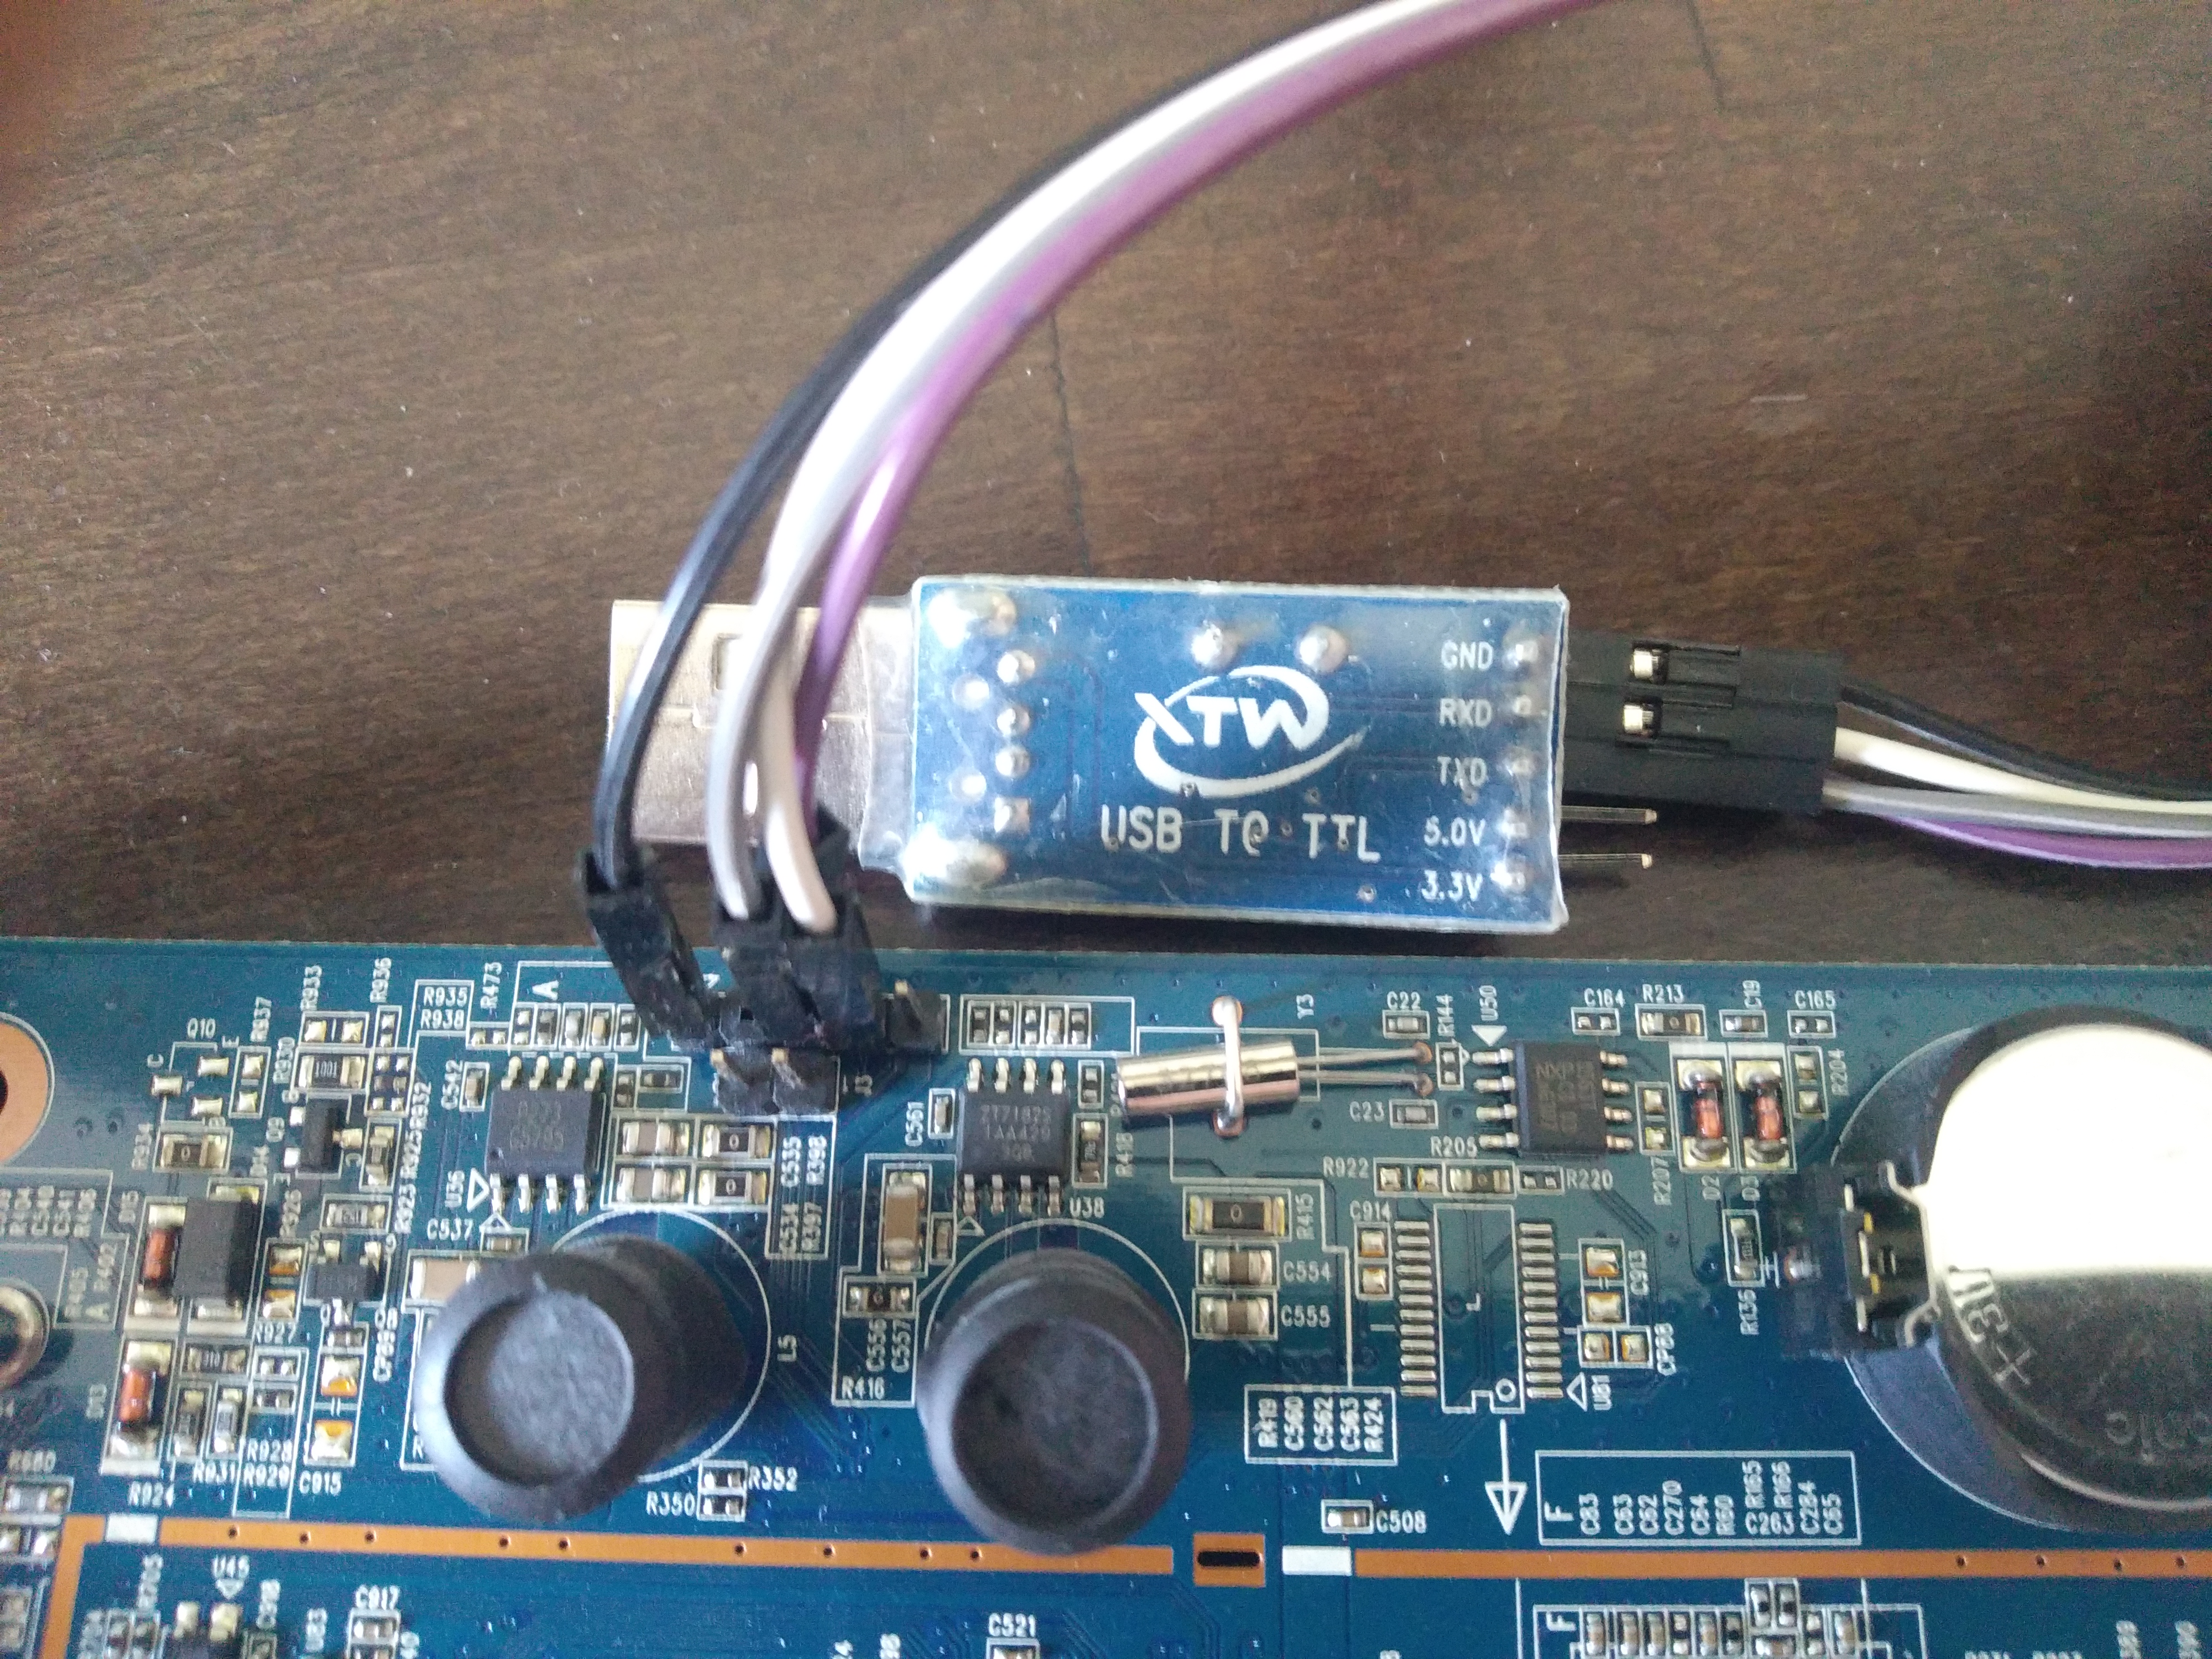
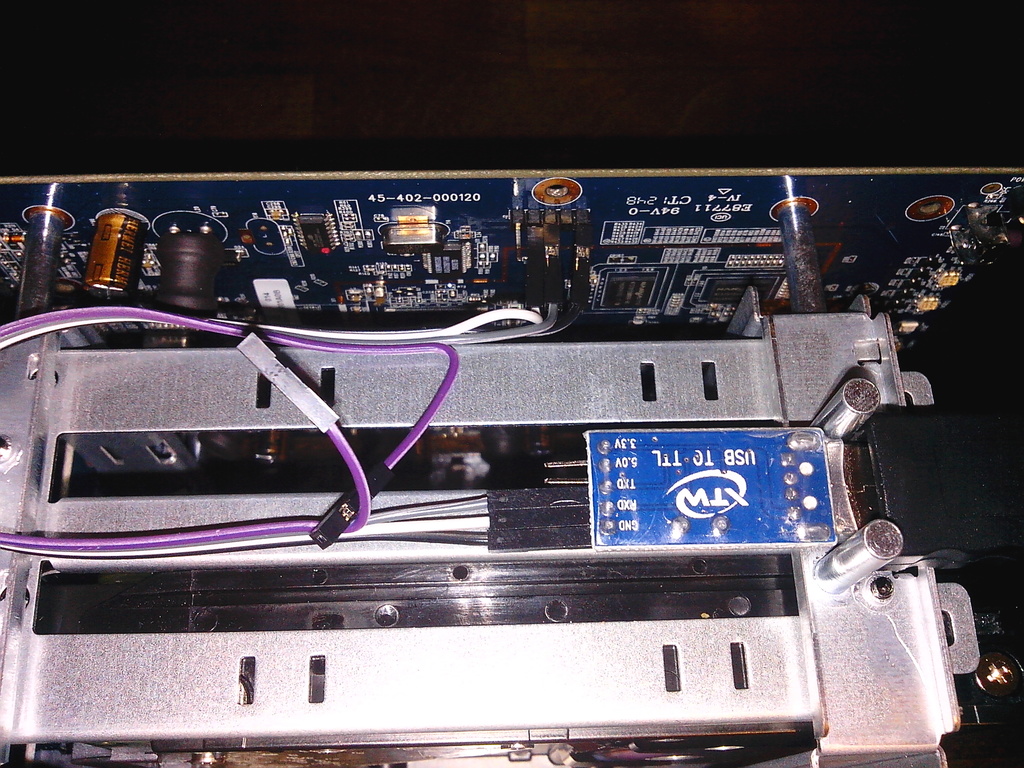
USB TTL to NSA-320
NSA325: http://dl.panticz.de/zyxell/tty_nsa325.jpg
NSA320: http://dl.panticz.de/hardware/zyxel_nsa320/nsa320_usb_ttl.jpg

install ssh
wget ftp://ftp.zyxel-tech.de/2.new_mirror/NSA310/4.40/zypkg/web_prefix -O /i-data/d154583a/admin/zy-pkgs/web_prefix
# firmware / package / reload
# install ffp
/i-data/d154583a/admin/zy-pkgs/ffp/ffp.log

ZyXEL NSA320
https://forum.doozan.com/read.php?2,88619

Update uboot
http://forum.doozan.com/file.php?3,file=160,filename=kwboot-tool.tar.gz,download=1
download: https://bitly.com/1W6D2pd

dhcp
tftpboot 0x800000 uboot.2017.07-tld-1.nsa325.mtd0.kwb
nand erase 0x0 0x80000
nand write.e 0x800000 0x0 0x80000
reset

Create USB boot disk
download: https://bitly.com/3zCSrnC

DEVICE=/dev/sdc

sudo umount ${DEVICE}*
sudo parted ${DEVICE} -s rm 1
sudo parted ${DEVICE} -s mklabel msdos
sudo parted ${DEVICE} -s mkpart primary ext3 0% 100%
sudo mkfs.ext3 ${DEVICE}1 -F -L rootfs
sudo mount ${DEVICE}1 /mnt
sudo tar xjf Debian-5.13.6-kirkwood-tld-1-rootfs-bodhi.tar.bz2 -C /mnt/
sync
sudo umount ${DEVICE}1

Boot from NAND (optinal)
https://forum.doozan.com/read.php?2,12096
download: https://bitly.com/3zCSrnC

Read SNMP informations from a device from Ubuntu / Linux

sudo apt-get install snmp
snmpwalk -v1 -c public 192.168.1.2

OpenWrt on TP-Link TL-WR941ND / TL-WR1043ND / TL-WDR3600 / TL-WDR4300

# 15.05
https://downloads.openwrt.org/chaos_calmer/15.05.1/ar71xx/generic/

# 18.06.3
https://archive.openwrt.org/releases/18.06.3/targets/ar71xx/generic/

flash tl-wr1043nd

URL=http://downloads.openwrt.org/chaos_calmer/15.05.1/ar71xx/generic/openwrt-15.05.1-ar71xx-generic-tl-wr1043nd-v1-squashfs-factory.bin
wget ${URL} -P /tmp
scp /tmp/openwrt-15.05-ar71xx-generic-tl-wr1043nd-v1-squashfs-factory.bin root@192.168.1.111:/tmp/
ssh root@192.168.1.111
echo 3 > /proc/sys/vm/drop_caches
mtd -r write /tmp/openwrt-15.05.1-ar71xx-generic-tl-wr1043nd-v1-squashfs-factory.bin firmware

flash tl-wdr4300

URL=http://downloads.openwrt.org/chaos_calmer/15.05.1/ar71xx/generic/openwrt-15.05.1-ar71xx-generic-tl-wdr4300-v1-squashfs-factory.bin
wget ${URL} -P /tmp
scp /tmp/openwrt-15.05.1-ar71xx-generic-tl-wdr4300-v1-squashfs-factory.bin root@192.168.1.111:/tmp
ssh root@192.168.1.1
mtd -r write /tmp/openwrt-15.05.1-ar71xx-generic-tl-wdr4300-v1-squashfs-factory.bin firmware
telnet 192.168.1.1
passwd
exit

TP-Link TL-WR1043ND OpenWrt
http://wiki.openwrt.org/toh/tp-link/tl-wr1043nd

# OpenWrt Sysupgrade
http://wiki.openwrt.org/doc/howto/generic.sysupgrade

#
# reset settings
#
# failsave
http://wiki.openwrt.org/de/doc/howto/generic.failsafe

#
# flash
#
# configure ip
echo "nameserver 192.168.1.5" > /etc/resolv.conf
ifconfig br-lan 192.168.1.111 up
route add default gw 192.168.1.5

# free memory
echo 3 > /proc/sys/vm/drop_caches

Adaptec RAID controller / arcconf

arcconf GETLOGS 1 DEVICE 

# list logical devices
arcconf GETCONFIG 1 LD

# list phisical devices
arcconf GETCONFIG 1 PD

# start adaptec verifi
arcconf TASK START 1 DEVICE 0 0 VERIFY

arcconf GETSTATUS 1

# create JBOD on all devices
# get device count
COUNT=$(arcconf GETCONFIG 1 PD | grep "Hard drive" | wc -l)

# create JBOD on all devices
for CHANNEL in `echo $(seq 1 ${COUNT})`; do
    CHANNEL=$((CHANNEL-1))
    echo ${CHANNEL}

    arcconf CREATE 1 JBOD 0 ${CHANNEL} noprompt
done

# delete devices
arcconf DELETE 1 LOGICALDRIVE ALL noprompt

# delete all JBOD devices
arcconf DELETE 1 JBOD ALL noprompt

# create RAID 10
arcconf CREATE 1 LOGICALDRIVE MAX 10 0 0 0 1 0 2 0 3 0 4 0 5 0 6 0 7 noprompt

Links
http://wiki.hetzner.de/index.php/Adaptec_RAID_Controller/en
http://www.thomas-krenn.com/de/wiki/Festplattenausfall_bei_Adaptec_RAID_Controller_mit_ARCCONF_beheben

Compile smartmontools

[embed_url: https://raw.githubusercontent.com/panticz/scripts/master/compile.smartmontools.sh]

check smartctl version

smartctl -V

Old vesion

# Install required software
apt-get update
apt-get install -y subversion build-essential automake

# Get smartmontools from repository
svn co https://smartmontools.svn.sourceforge.net/svnroot/smartmontools/trunk/smartmontools smartmontools

# Compile
cd smartmontools
./autogen.sh
./configure
make
make install

Links
http://sourceforge.net/apps/trac/smartmontools/wiki/Download
http://sourceforge.net/projects/smartmontools/files/smartmontools/
http://sourceforge.net/apps/trac/smartmontools/wiki/Download#Installprecompiledpackage

Update Mellanox firmware under Ubuntu

Install Driver
http://www.panticz.de/mellanox/install-dirver

Install MFT
http://www.panticz.de/install-mellanox-mft

Get NIC info

# get controller info
for MST in $(mst status | grep "mst" | cut -d" " -f1); do
    flint -d ${MST} query #| egrep "FW Version|UEFI|PSID"
    echo
done

# get board id for update
for MST in $(ls /dev/mst/*); do
    echo ${MST}
    flint -d ${MST} query | grep PSID | cut -d":" -f2 | tr -d ' '
    echo
done

# reset parameter
for MST in $(ls /dev/mst/*); do
    mlxconfig -y -d ${MST} reset
    echo
done

Get cable statistics
https://www.mellanox.com/related-docs/MFT/MFT_user_manual_4_8_0.pdf

mst start
mst cable add
mlxcables

mget_temp -d /dev/mst/mt4117_pciconf0
mlxcables -d mt4117_pciconf0_cable_0 -q
mlxcables -d mt4117_pciconf0_cable_0 --read_all_regs
mlxcables -d mt4117_pciconf0_cable_0 --DDM

Links
http://www.mellanox.com/page/firmware_HCA_FW_identification - Firmware Support and Downloads - Identifying Adapter Cards
http://www.mellanox.com/page/firmware_table_IBM
http://www.mellanox.com/page/firmware_HCA_FW_update
http://www.mellanox.com/page/firmware_NIC_FW_update
http://www.mellanox.com/content/pages.php?pg=firmware_HCA_FW_update
http://www.mellanox.com/pdf/MFT/ESXi_bootable_mst_README.txt
http://www.mellanox.com/page/products_dyn?product_family=27
http://www.mellanox.com/page/products_dyn?product_family=26&mtag=linux_sw_drivers
http://www.mellanox.com/page/infiniband_cards_overview
http://www.mellanox.com/page/firmware_table_ConnectX2EN
http://www.mellanox.com/content/pages.php?pg=firmware_HCA_FW_identification
http://www.mellanox.com/content/pages.php?pg=management_tools&menu_section=34
http://packages.ubuntu.com/search?searchon=names&keywords=libmlx

Linpack under Ubuntu / Linux

Check latest LINPACK version
https://software.intel.com/en-us/articles/intel-mkl-benchmarks-suite

# https://software.intel.com/sites/default/files/managed/cc/19/l_mklb_p_2019.6.005.tgz

configure parameter

export MKL_DYNAMIC=false
export OMP_NUM_THREADS=4

Run LINPACK

wget https://raw.githubusercontent.com/panticz/scripts/master/run_linpack.sh -qO- | bash

[embed_url: https://raw.githubusercontent.com/panticz/scripts/master/run_linpack.sh]

Install LINPACK
[embed_url: https://raw.githubusercontent.com/panticz/installit/master/install.linpack.sh]

Get CPU info

CPU=$(cat /proc/cpuinfo | grep "model name" | tail -1)
COUNT=$(cat /proc/cpuinfo | grep processor | wc -l)

echo "
CPU   : ${CPU}
COUNT : ${COUNT}
"

Links
http://www.roylongbottom.org.uk/linpack%20results.htm

Brother MFC 7320

Install printer
[embed_url: https://raw.githubusercontent.com/panticz/installit/master/hardware/install.brother-mfc-7320.printer.sh]

Install scanner
[embed_url: https://raw.githubusercontent.com/panticz/installit/master/hardware/install.brother-mfc-7320.scanner.sh]

Scanner
First POWER OFF your Brother MFC-7320
http://www.panticz.de/sites/default/files/scripts/install.brother-mfc-7320.scanner.sh
Now you can POWER ON your Brother MFC-7320 again
Go Applications > Graphics > Simple Scan

Fax
not tested yet, see: http://wiki.ubuntuusers.de/Brother/Fax

Links
http://wiki.ubuntuusers.de/Brother/Drucker
http://wiki.ubuntuusers.de/Brother/Scanner
http://wiki.ubuntuusers.de/Brother/Fax
http://welcome.solutions.brother.com/bsc/public_s/id/linux/en/download_prn.html#MFC-7320
http://welcome.solutions.brother.com/bsc/public_s/id/linux/en/download_scn.html

Pagination

  • Previous page
  • 5
  • Next page
hardware
Profiles GitHub StackOverflow LinkedIn Xing
Contact Imprint
© panticz 2026

Cookie-Einstellungen

Diese Website nutzt eingebettete Inhalte von Drittanbietern (z.B. YouTube, SoundCloud). Beim Laden dieser Inhalte werden Daten an die jeweiligen Anbieter übermittelt. Datenverarbeitungserklärung